autumnal Curry

Oh, October. A month holding the last days of summer with opulent rhapsody of ripe fruit and veg. A month where warming meals are becoming the main staple in or menus. A month bringing us shorter days and more time to cook!

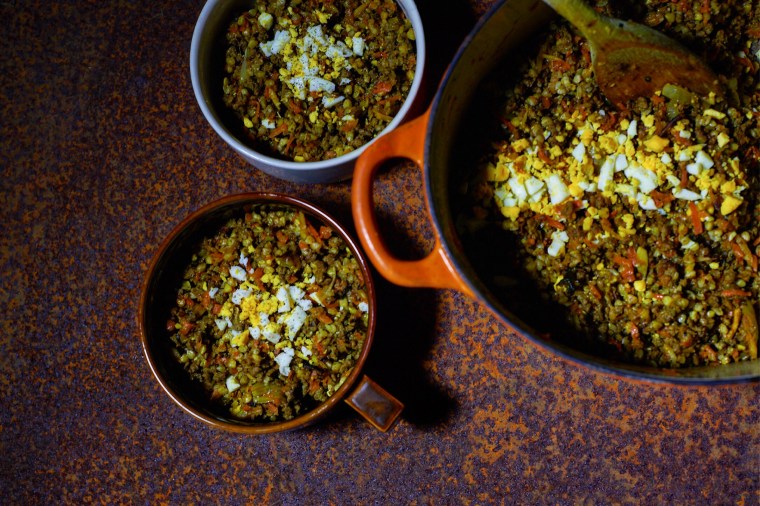
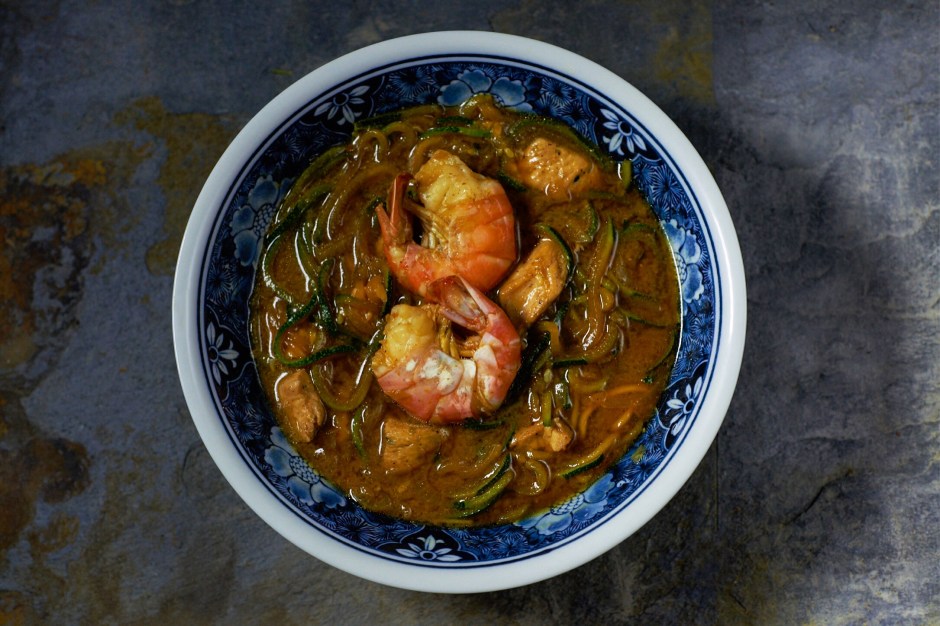
When it comes to cooking, I think it is best to use ingredients not only available in the kitchen, but particularly what’s in season. Japanese autumnal curry is one of the meals I cannot wait to cook when the first days of Indian summers are melting with bygone summer. This curry is easy to make it, and an excellent meal for post holidays blues – allowing you to enjoy something more exotic than your average comfort food.

IMG_3393

What  do you need to prepare this dish:

2 medium carrots
1 onion
1/4 of celeriac
1 parsnip
2-3 bay leaves
a few allspice corns
2 tablespoons of Worcestershire sauce
a handful of cashew nuts
1 fresh red chilli chopped
approx. 2 tablespoons of curry paste (I leave the spiciness to your taste)
1 tablespoon of curry powder
pinch of fresh herbs such as oregano, dried garlic leaves
2 cloves of smoked garlic ( although regular will do too)
300-500g of white buckwheat
2 boiled eggs for garnish
500g of lean beef mince

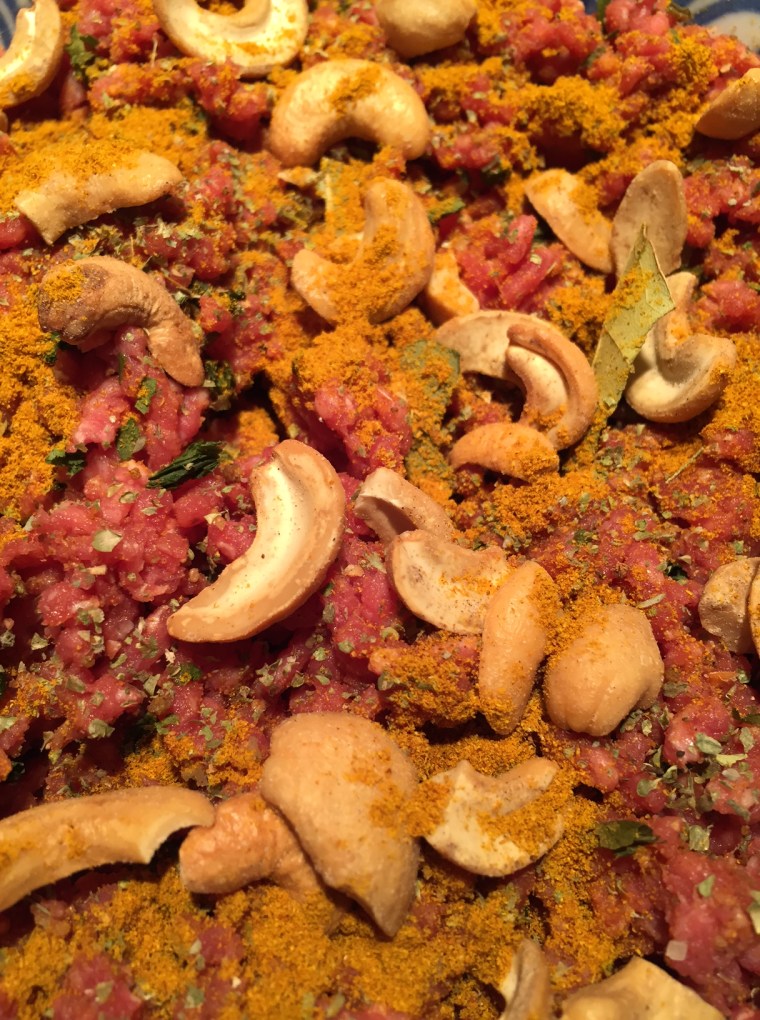
 Start by marinating the mince meat. I try to marinate it the night before  so all the flavours of spices and herbs are mix together wonderfully. I attach the photo to show you the way I marinate the meat then keep it covered in the fridge overnight (cling film cover a bowl will do nicely).
Fry the beef on heavy bottomed pan with a glug of olive oil.
Sprinkle the Worcestershire sauce and add chopped chilli. Then when the meat is semi cooked add grated vegetables, including the onion. These can be grated using the largest sheds on your grater.
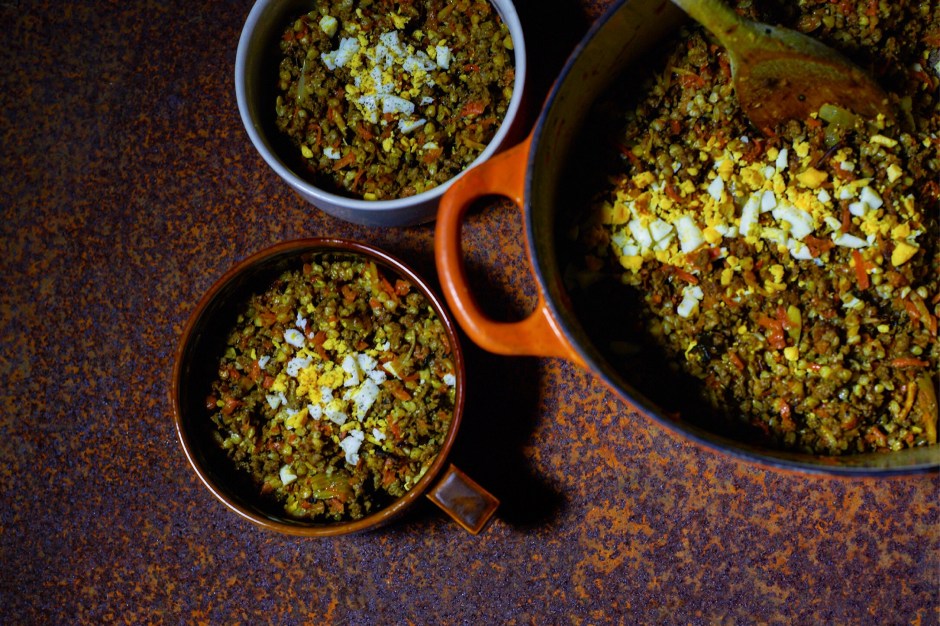
Mix all together and sauté, covered by lid. After 5 to 7 mins everything should be ready but not overcooked. Toss everything once again and let it dry a bit, as the idea of this meal is not to be too “juicy” as all the flavours are in the meat mixed with veggies.

img_5318

Once the meal is ready to be served, sprinkle the top of the meal by chopped egg and freshly grounded pepper.

Enjoy!

IMG_3394

when in Faro 

When I’m on holidays, the best thing is discovering new places to dine.

My Portuguese discovery in Faro: Cafè Aliança. Not only because of its heritage, beautifully restored interiors,  but mostly due to an amazing atmosphere, simple but sophisticated menu and professional yet friendly waiters. 

Last but not least, this was a favourite haunt of Simone de Beavoir herself! No wonder I enjoyed my lunch (and Aperol) fully.  

A place not to be missed! 

Rhubarb&Fig&Duck

Like most of my cooking ideas, this one was created by a stroke of creativity.
Or too much rhubarb! As this bitter-sour leaf is in season,  I’m buying this in unlimited quantities and then I wonder: what to do with it? Cook it, obviously! I never thought as an ingredient it would a be a good match for a duck, but hey, why not try it?
This is how this meal became my statement dish for a high summer.
I also love the duck as an alternative to the chicken.

172_18.03.16_WojtekVanPortek_FoodShoot_Shot 09_DuckConfit
185_18.03.16_WojtekVanPortek_FoodShoot_Shot 09_DuckConfit

Season the duck legs and finish with crushed pistachio.
Place them in the cast iron dish on top of rhubarb, figs and shallot onions.
Bake in the oven at 180C for about 60-70 mins (depending on the size of the meat).
Caution: addiction to this meal is very likely to happen! #yum

320_18.03.16_WojtekVanPortek_FoodShoot_Shot 09_DuckConfit

DuckConfit

Lydia


Lydia’s trademark is a black eyeliner. Pictured here at Spring Studios, where she’s a Sample Coordinator Manager for e-Commerce projects, she appears shy of the camera.
In fact it took me few good months to convince her to be portrayed in this blog. One of the qualities of this beautiful girl is that whatever happens on set, or if we stylists are missing some essential product, she always calmly help and find out for what are we looking for.
Lydia has an adorable  13 year old dog named Poppy, who’s suffering from Dementia. Poppy spends her days with Lydia at Spring Studios and has became a studio mascot.
A part of the team, really.

IMG_1467

Pan Roasted Prawns

This is the best alternative to barbecued prawns, plus it keeps in all the juices and does not burn the shells. Pan grilled prawns are a great snack or as part of a meal (such paella or buckwheat and rocket salad). Another excellent solution: I freeze some leftover grilled prawns; divide to portions (3 -4 per portion) and use for a soup stock. They add such amazing flavour to ramen style broths!

IMG_3487

Season prawns by sea salt and coarse pepper, and finely chopped parsley.
If you like garlic, add it at the end of the grilling process so it won’t burn out and will leave a pleasant aroma on the prawns. For the best result fry them with grated butter.
And then grate more on top of the shells. This will prevent them from drying and keep it moist.

Enjoy!

Scallops&Buckwheat

In search for a summer meal? Well, there’s nothing better than scallops carmelised with sesame oil. A succulent and light alternative to meaty meals. Buckwheat roasted with shallot and pumpkin seeds is a delicious companion to sesame fried scallops.

To prepare meal for two:
100g of white buckwheat
8-10 scallops (fresh or frozen)
1 medium shallot onion
a handful of pumpkin seeds
1 tbsp of sesame oil
2 tbsp of white sesame seeds

IMG_3407

Cook  buckwheat according to the instructions on the packaging. When ready drain well from water and fry with chopped shallot, then season with coarse pepper and sea salt and add the pumpkin seeds.
Meanwhile dry the scallops with paper towel (especially when defrosted) and sprinkle them with sesame oil and sea salt. Following this dip the scallops in sesame seeds. Heat a heavy bottomed pan and fry them for about 5 mins until tender and carmelised. Leave to rest for a minute before serving.

263_18.03.16_WojtekVanPortek_FoodShoot_Shot 03_ScallopsOnWhite

TIP: 1. do not overdose with sesame oil, otherwise scallops will tend to burn rather than fry.
2. fry scallops on both sides in total time approx 5 mins.
3. to perfectly fry the onion with the buckwheat, start with lightly frying the shallot with a glug of olive oil and when softened, add cooked buckwheat and toss all together. Finally  add the pumpkin seeds.

IMG_3403

Enjoy!

Sausage and gluten free pasta.

If, like me, you are a fan of good pasta and cumberland sausages then this will be a welcome addition to your dining table. The original recipe came from Jamie Oliver but I’ve updated it to my own taste. You can use any kind of shape and size of pasta. Have fun’!

You will need:

One small grated apple. Tart are best.
300-500g of gluten free fusilli pasta
6 good quality cumberland sausages (I’m using skinless from Heck), broken into small pieces before cooking
a handful of oregano (fresh or dried)
2 spoons of pickled chili pepper / chopped chili peppers
1 tbsp of wholegrain mustard
2 garlic cloves
250-300 ml of white wine
zest and juice from 1 unwaxed lemon
shaved parmigiano cheese to sprinkle

IMG_3392

This dish can be prepared in 3 simple steps:

Mix freshly chopped oregano, chili peppers and garlic with the sausage meat and fry with a dash of olive oil in a heavy bottomed dish. When the meat is about to caramelise and turn golden brown add mustard, pour in the wine and add the lemon juice and zest finishing with apple.
Lower the heat and cover the pan with a lid.

In the meantime cook the pasta following the instructions on the packaging.
The best way to prepare the pasta is al dente which matches the texture of the meat perfectly.

When pasta is drained add it into the pan with the meat and mix it all together.
This is the moment you decide how much pasta to add to the meat, depending on how you like your meal. I’ve balanced mine as I am not a huge fan of having more pasta than meat and vice versa.

111_18.03.16_WojtekVanPortek_FoodShoot_Shot 13_MISC

TIP: wholegrain mustard isn’t necessary, however it enhances beautifully flavour of this  meal.

Serve immediately with sprinkled parmigiano on top. Enjoy!

IMG_2574

Courgette&Quorn&Miso

The idea was born the moment the Spiralizer was delivered to my doorstep. Initially I wasn’t really sure about this funny plastic machine, but I soon enjoyed the benefits of substituting classic carb noodles for pasta made entirely from fresh vegetables using the Spiralizer. After perfecting the technique of homemade courgette pasta, I combined my japanese friend Mariko love of Miso, with my partner’s love of quorn. Voila! It is a super solution for a late spring/early summer menu and you can play with the ingredients to make this meal more bespoke (e.g. chicken instead of quorn and shrimp replaced with radish). Although it sounds exotic, this one of the easiest meals to prepare. Go on, start winding this courgette!

1 courgette
2 garlic cloves
2 tbsp of good soy sauce
2 tbsp of miso paste  (red is the best)
1 small shallot onion, diced
about 350-400 ml of boiling water (depending on how intense flavour you’d like to achieve)
a 300g bag of “chicken” quorn (frozen is absolutely fine)
a few tiger prawns for a garnish

IMG_3420IMG_3421

Shred the courgette on the noodles blade of the spiralizer. Heat a glug of olive oil in a non-stick pan and sauté onion, garlic, and quorn pieces until softened. In the meantime mix the miso paste with soya sauce in boiling water and pour into pan. Stir gently and add courgette noodles.
Cook for about 5 mins. Ready, simple and yummy!

IMG_3396

Fig&Rhubarb&Almond tart

Whats not to like about desserts made from seasonal fruits? This dish is a great appetiser to keep you going between lunch time and dinner and a perfect companion for the tea time ritual! Most importantly, a fruit tart is easy-to-make and you can pride in creating your own pastry masterpiece!

IMG_3400

My fig and rhubarb tart with almond flakes is suitable for even the most inexperienced of beginners;

Firstly, prepare the filling with:
about 10 ripened figs (sliced)
2 medium rhubarb sticks sliced into sections of about 2 cm
a handful of flaked almonds
a couple of tbs of cane sugar
juice of 1/2 lemon

Place the rinsed, trimmed and sliced figs with rhubarb into the bowl, add almond flakes along with sugar. Mix gently. Sprinkle with lemon juice and leave in the fridge.

IMG_3411
To make the dough you’ll need:
3 cups of the plain flour
1 tbsp of baking powder
1/2 cup of caster sugar for the dough
2 tbsp of caster sugar to bind the white eggs
4 chilled eggs
250g butter, preferably unsalted (not margarine)
seeds from 1/2 of vanilla pod or a few drops of vanilla extract

Mix flour with baking powder and add vanilla seeds and butter. Chop them with knife on the worktop surface or mix very slowly in a food mixer. Separate and add 3 egg yolks and 1 whole egg (keep the remaining egg whites for later!)
Mix all together and divide for 2 parts. Proportions I am using are:  3/4 of the mixture for the bottom of the cake and 1/4 of the dough to shred on top of the tart. Wrap both parts in some cling film and leave in the fridge to rest for about 30 mins.
TIP: to make this easier, roll the larger part of the dough to the size of the baking tray you’ll use and then put into the fridge.

In the meantime set up oven for 180C , bind the remaining egg whites  with the caster sugar and when thick, stir gently into the fruit mixture. Place all into the cake form with dough at the base. When filled, shred remaining 1/4 of the dough on top of the tart (the largest wholes in a cheese grater are best for this). Bake for about an 1 hour. If the top is baking too quickly, you can cover it by the baking paper or aluminium sheet to avoiding any burning.

IMG_3412
It tastes best with vanilla ice cream and covered by dash of icing sugar on top.

Enjoy!